|
The tests for the determination of the throughput and for the monitoring of particle movements are divided into the
following work steps:
Equalizing the amplifier Setting up the zero gap (rollers in zero position) Setting up the preload on the rollers and the motor speed Filling in the material Switching on the transient recorder and ŌĆō for videos ŌĆō the video system (stand-by) Clutching in the motor
After reaching the stationary operation mode:
Starting the data recording by switching the sample taking flap, in the case of videos also starting the video
system Switching back the sample taking flap, declutching the motor Saving the test data on the connected computer Weighing the sample mass Conducting the computer based short analysis, logging the complete measurement data
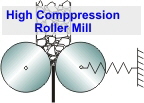
The specific grinding force Fsp is an essential parameter of the tests; it is the basis to determine the level of the necessary absolute grinding force, which again results from zero gap, preloading force, horizontal roller movement and spring constant. The horizontal roller movement is furthermore depending on the feed material, the circumferential roller speed and the roller surface structure.
In principle the desired grinding force can be adjusted during the mill operation what however is not possible during
short time tests. Therefore in pre-tests that combination of zero gap and preloading force has to be defined which leads to the desired grinding force in operation. For measuring the pressure
distribution additional channels of the transient recorder for pressure and rotation angle measurement have to be activated. Beside this the test execution is the same. The pressure sensors are
calibrated in the built-in state by appling weights before and after each test series to detect damages immediately.
After finalizing a test series the measurement data is transferred online from the connected personal computer for data
recording to the institute computer. There the archival storage and the final analysis is done.
The analysis of the particle size distributions was done as follows:
Deglomeration of the sample by sparing crushing the agglomerates with a rubber plug Sample partitioning to analyse weight Deglomeration of the wet sample by ultrasonic Wet sieving with a R5-set of sieves above 0,100 mm Microscopic control of the deglomeration and sieving quality
and if necessary:
Fraunhofer-diffraction analysis of the material < 0,200 mm with a laser granulometer (Type: Helos, Supplier:
Sympatec) Combining both analysis at 0,160 mm
The accuracy for measuring the sample weight and the sample taking time is ┬▒ 0,1 g resp. ┬▒ 0,01 s. With the smallest
sample mass of 500 g and a sample taking time of 2 s a maximum error of 0,5 % results for the throughput. The throughput is again related to the circumferential roller speed which has a tolerance of ┬▒
0,5 % due to motor speed control.
The accuracy class of the load cells for the determination of the grinding force is 0,2 %, those of the torque measurement
shafts are 0,8 %. Rotation angle and gap width are recorded with an accuracy of ┬▒ 0,1 %. The calibration of the home-made pressure sensors showed an accuracy of ┬▒ 1,0 % of the maximum value, the
resolution of the angle measurement was ┬▒ 0,5┬░ with a sensor tip diameter of 2 mm.
The unaccuracies of the measurements are significantly lower than the impact of feed material variations on the
measurement. Therefore unaccuracies of the measurement equipment can be neglected.
|


